Supabase in Production: What Actually Changes for You
Supabase in production explained: your database never needs a deploy step, it's already live. Here's what actually connects to it.

You just deployed your frontend to Vercel and your backend to Render, and each time, there was a real "deploy" step: connect the repo, click a button, wait for a build. So you open your Supabase dashboard looking for the same thing: a deploy button, a "go live" switch, anything. There isn't one. That's not a bug in the dashboard. It's because your database has been live this whole time.
Your Supabase database never needed deploying because it was hosted on Supabase's own servers from the second you created it back in lesson 07.03. Your laptop only ever ran the Table Editor showing you what was inside it; the actual database was always somewhere else, always on. This lesson is about what that means now that your frontend and backend are live too.
Key Takeaways
- Your Supabase database has been live since lesson 07.03. There's no deploy step for it, ever.
- "Connecting" your deployed backend to it means giving Render the same URL and API key your local script used, as environment variables instead of a
.envfile.- The free tier allows 60 direct connections and 200 pooler connections. Worth knowing exists, not worth worrying about yet.
- A real error you might one day see is "Max client connections reached." It's rare at hobby scale and has a known fix.
Does Supabase Need to Be Deployed?
No. That's the whole point of this lesson. Every other piece of your project needed a deploy step because it started out running only on your laptop. Your index.html file only existed in a browser tab you opened yourself. Your FastAPI server from lesson 07.01 only ran when you typed uvicorn main:app into your own terminal. Deploying those meant copying them onto a server that stays on.
Supabase skipped that problem entirely. When you created your project, Supabase spun up a real, running Postgres database on its own infrastructure right then. Not a local copy you'd later need to move. The Table Editor you've been using is just a window into that already-live database, the same way a banking app is a window into money that was never sitting in your phone.
If you skip this lesson entirely and just start pointing your deployed backend at your database URL, nothing breaks. That's exactly the point. There's no missing step to trip over here.
I still catch myself checking for a "Deploy" button on my own Supabase projects out of habit, two build-log screens deep into muscle memory from Vercel and Render. There's nothing to click, because the waiting already happened, back when you clicked "create project" in 07.03.
What Supabase in Production Actually Connects To
So if the database is already live, what's left to do? Your live Render backend needs two pieces of information to talk to it: the Project URL and the anon/public API key, the exact same two values your local script used, back in Module 05's .env pattern.
The difference is where those values now live. Locally, they sat in a .env file on your laptop, loaded by load_dotenv(). On Render, they'll live as environment variables set directly in Render's dashboard: a concept this lesson is naming, not fully setting up. Lesson 09.08 walks through adding them for real, so you're not duplicating that work here.
Skip this step and your deployed backend will crash or silently fail every time it tries to query your data, because it has no idea where "your data" even is. The values aren't optional wiring. They're the entire connection.
Think of the URL and key as an address and a key card, not a login form. Your backend isn't "logging in" to Supabase the way you log into a website, it's using a fixed address and fixed credential to reach a database that's always sitting there waiting.
One distinction worth locking in now, before it matters: the anon/public key you just found is safe to use in a deployed backend, and Supabase expects it to be seen. It's paired with row-level security rules that decide what it's actually allowed to touch.
Your Supabase project also has a separate service role key, which bypasses those rules entirely. That one should never appear in frontend code, a public repo, or anywhere a browser can read it. For the beginner projects in this course, the anon key is the only one you need.
Connection Limits: The One Thing Worth Knowing Early
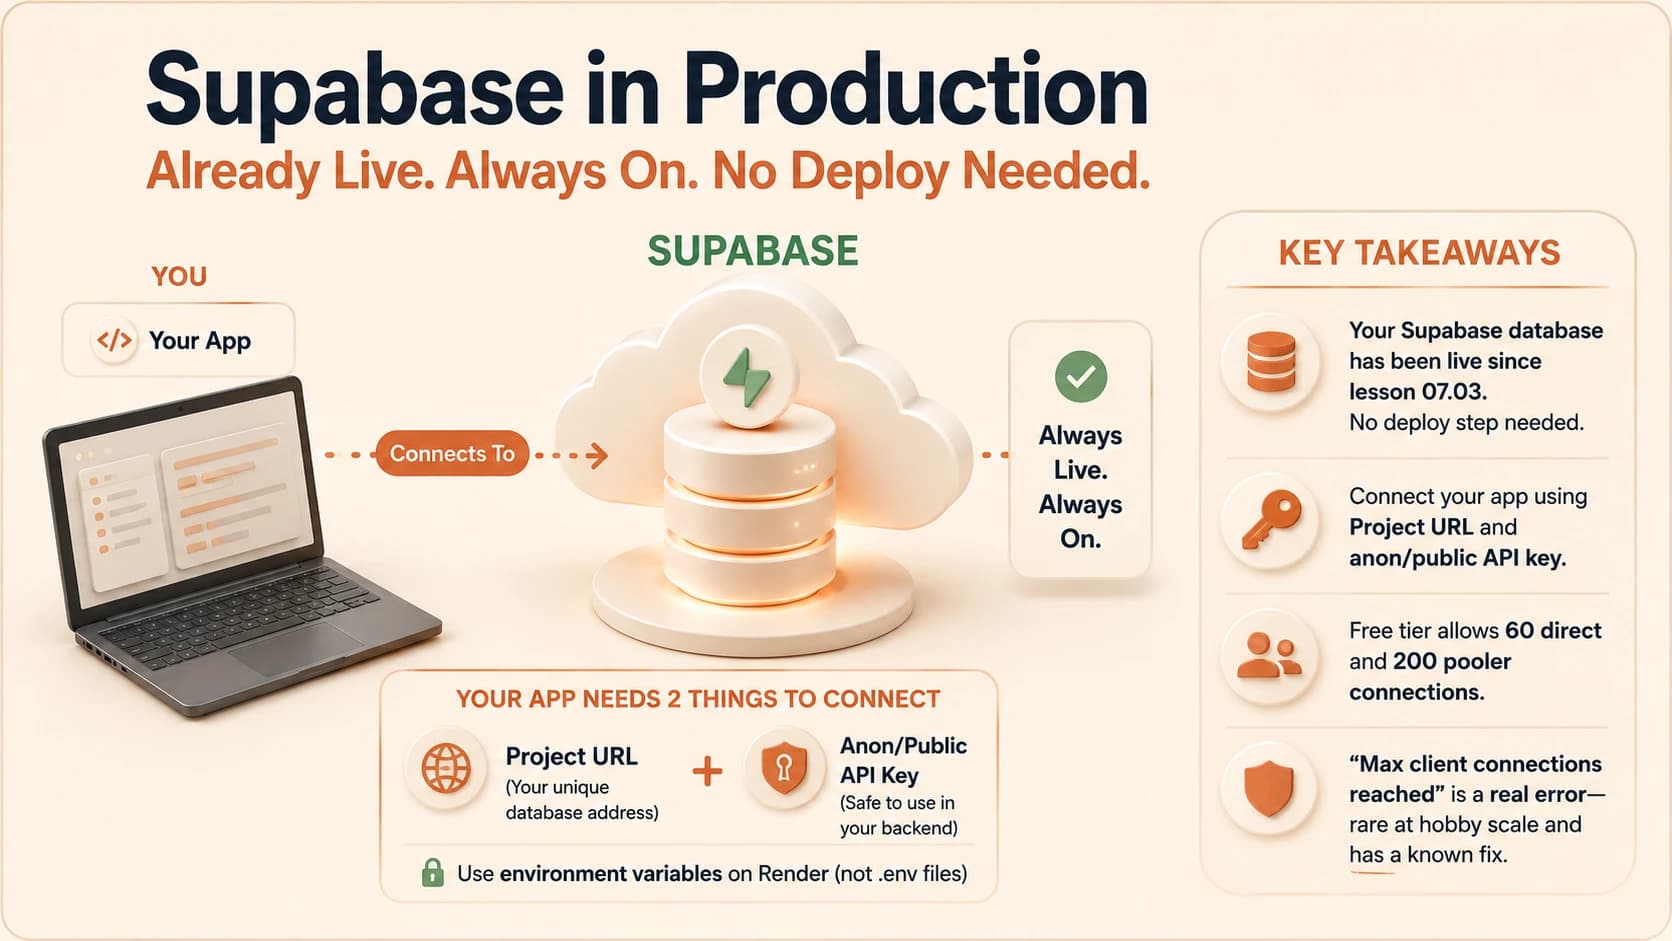
Here's the one production-specific wrinkle worth knowing about now, even though you won't hit it yet. Supabase's free tier allows up to 60 direct connections and 200 pooler connections to your database at once. Every time your backend queries the database, it briefly opens a connection. If too many happen at the same time, new ones start getting rejected.
The real error text, if you ever see it, looks like this: Max client connections reached. It's not your app crashing. It's Supabase telling you the ceiling was hit.
For a personal project, a portfolio piece, or something shared with a few friends, this is genuinely rare. It tends to show up only once real traffic grows into the hundreds of simultaneous users, which is a good problem to have, not a today problem.
A common overcorrection when developers first hear about connection limits is setting connection_limit=1 in their database config, hoping to play it safe. In practice this usually trades one error for a worse one: requests start timing out instead of failing cleanly. If connections ever do become a real issue, the actual fix is switching to transaction-mode pooling through Supabase's built-in pooler (Supavisor), not artificially starving your own app of connections.
Skip understanding this entirely and, at hobby scale, you'll likely never notice. But if your project ever does start seeing real usage, this is the first thing to check when things get slow or start throwing unfamiliar errors, and you'll recognize the symptom instead of guessing.
The same habit that helps with hosting costs (lesson 09.13) helps here too: Supabase's dashboard shows your current connection count under its Database settings. Checking it occasionally once a project has real users costs you thirty seconds and turns "mystery slowdown" into "oh, I know exactly what that is."
If any of this feels like it came out of nowhere, the full Getting Started path walks through every earlier module this lesson builds on, from the terminal to your first database.
Find your Supabase production connection details
In your Supabase project, go to Project Settings > API.
Locate your Project URL and your anon/public API key.
Write down (in a private note, not committed anywhere) which of your deployed services (your Vercel frontend, your Render backend, or both) would need these values to talk to this database.
You're not adding them anywhere yet (that's lesson 09.08). This step is just about recognizing that these credentials, not a "deploy" button, are what connects a live app to your already-live database.
Done? You've completed Lesson 09.05.
FAQ