How Auto Deploy Works: From Git Push to Live Site
How auto deploy works: push code to GitHub and your platform rebuilds it and puts it live automatically, no manual upload, ever.

You pushed a one-line fix at 11pm, closed your laptop, and by the time you refreshed the live URL on your phone, the change was already there. No upload, no login to a server, no waiting for you to do anything else. That's auto-deploy, and you've already used it twice on the platforms you picked earlier without anyone naming it for you.
In this lesson, you'll learn exactly how auto deploy works on GitHub, from git push to your site going live. By the end, you'll be able to explain the whole loop in your own words, and know what to check when it doesn't behave the way you expect.
Key Takeaways
- Connecting a platform to GitHub once means every future
git pushtriggers a new deployment automatically- This pattern has a name: continuous deployment, part of the broader idea of CI/CD
- Behind the scenes: push → platform notices → pulls code → rebuilds → replaces the live version
- You don't need GitHub Actions or any YAML config for the auto-deploy Vercel and Render already give you
- Most platforms keep a history of past deployments, so a bad push can be rolled back in a couple of clicks
What Happens When You Push?
I still watch the dashboard the first few times I push to a new project, even though I know exactly what's about to happen. Here's the sequence, in order, every single time you push a commit to the branch your platform watches.
Skip understanding this loop and a failed deploy looks like magic gone wrong: you'll stare at an unchanged live site with no idea whether your push even registered, let alone why it didn't take effect.
- You run
git commitandgit pushfrom your terminal, the push itself working exactly as you learned in Module 04. - GitHub receives the new commit and notifies your connected platform through something called a webhook, an automatic signal, not an email you have to check.
- The platform pulls your latest code from GitHub, the same way
git clonewould on your own machine. - It rebuilds your project, installing dependencies and running your build command (this is previewed here and covered in full in the next lesson).
- If the build succeeds, the platform swaps the new version in and your live URL now serves it, usually within seconds to a couple of minutes.
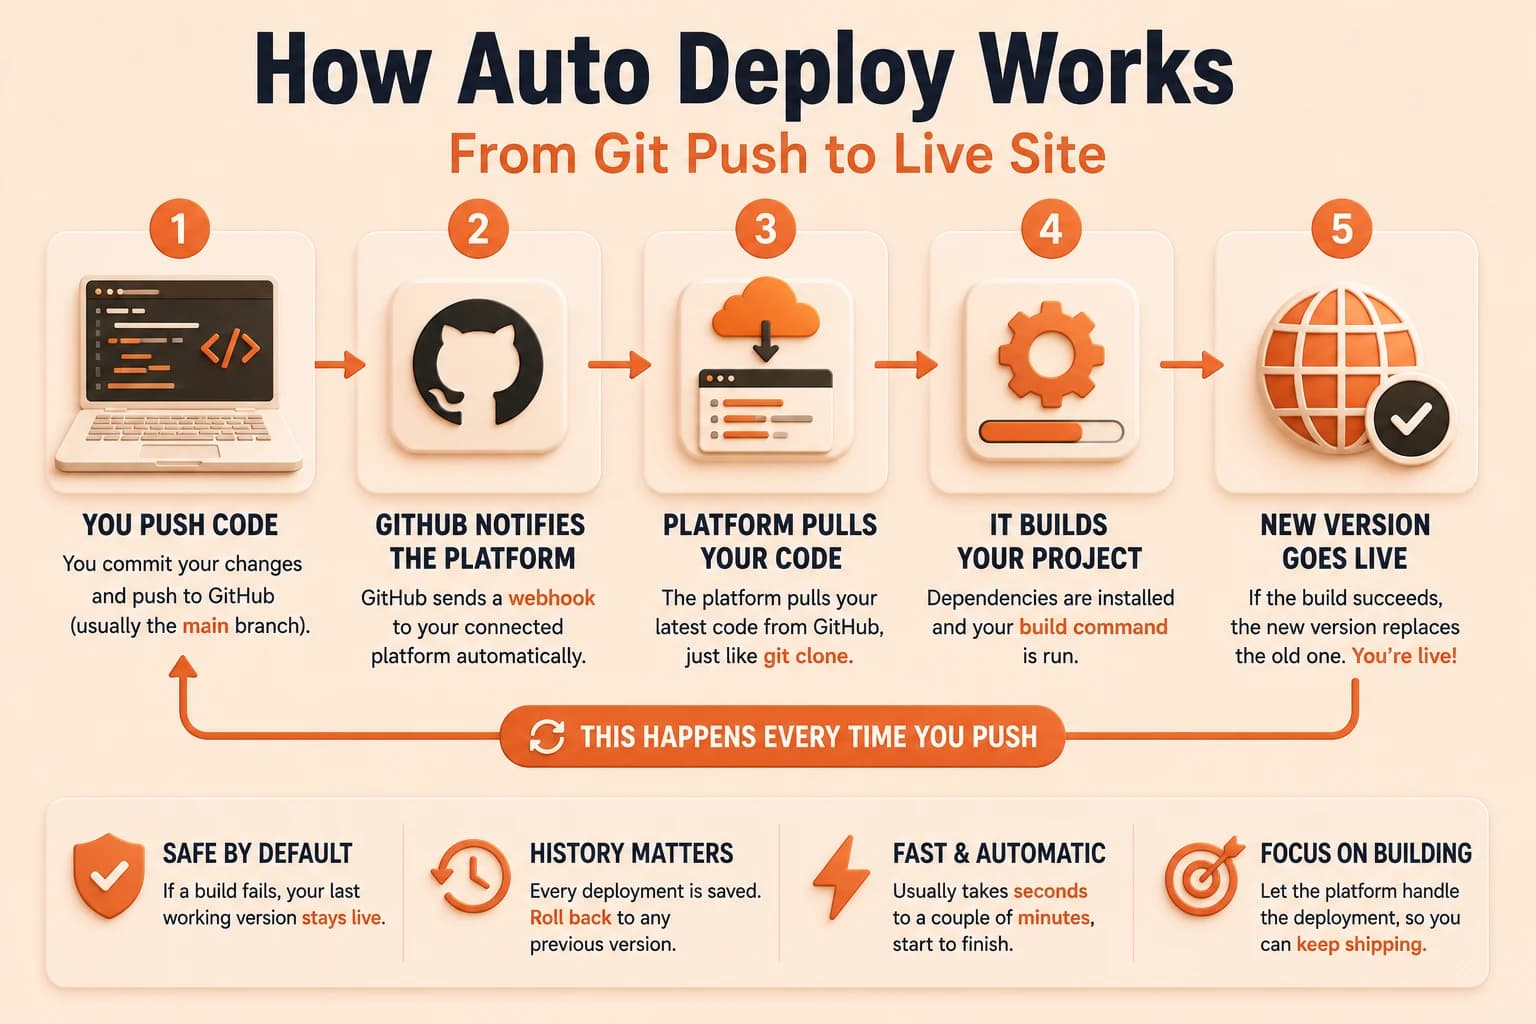
If you skip that fifth step and picture something simpler, like your old files just quietly editing themselves on a server somewhere, that's the misconception worth dropping. Nothing gets patched in place. A whole new version gets built and slotted in.
If you did your first Vercel deploy in lesson 09.03, open your Vercel dashboard right now and look at your deployment history. Every entry there is one full pass through this exact loop.
What Is Continuous Deployment, Actually?
Continuous deployment is the practice of automatically shipping every change that passes your build, with no manual release step in between. That's the whole definition. You've already been doing it.
It's one half of a pair you'll hear mentioned a lot: continuous integration (CI) tests new code automatically, and continuous deployment (CD) ships it automatically once it passes. Together, people shorten this to CI/CD.
Here's the part that trips people up: you do not need GitHub Actions, a .github/workflows folder, or any YAML file for the auto-deploy you already have. Vercel and Render both include their own native GitHub integration that handles this out of the box. GitHub Actions is a separate, more powerful tool for building custom pipelines, useful later, not required now.
If a project ever does need custom steps, like running tests before deploying, that's what GitHub Actions or similar tools add on top. For everything you've built so far in this course, the platform's built-in auto-deploy is the whole system.
Skip this distinction and you'll waste real time chasing GitHub Actions tutorials, writing YAML you don't need, for a problem your platform already solved the day you connected it.
The Old Way, and Why This Feels Different
Before this pattern existed, updating a live site meant connecting to a server directly, usually over something called FTP, and manually copying your changed files across every single time.
Miss a file, upload to the wrong folder, or forget a step, and the live site would break in ways that were hard to trace back. Every update was a small, repeatable chance to make a mistake, and someone had to remember to do it.
Auto-deploy removes that step entirely. The same process runs identically every time, triggered by the one action you were already taking: pushing your code.
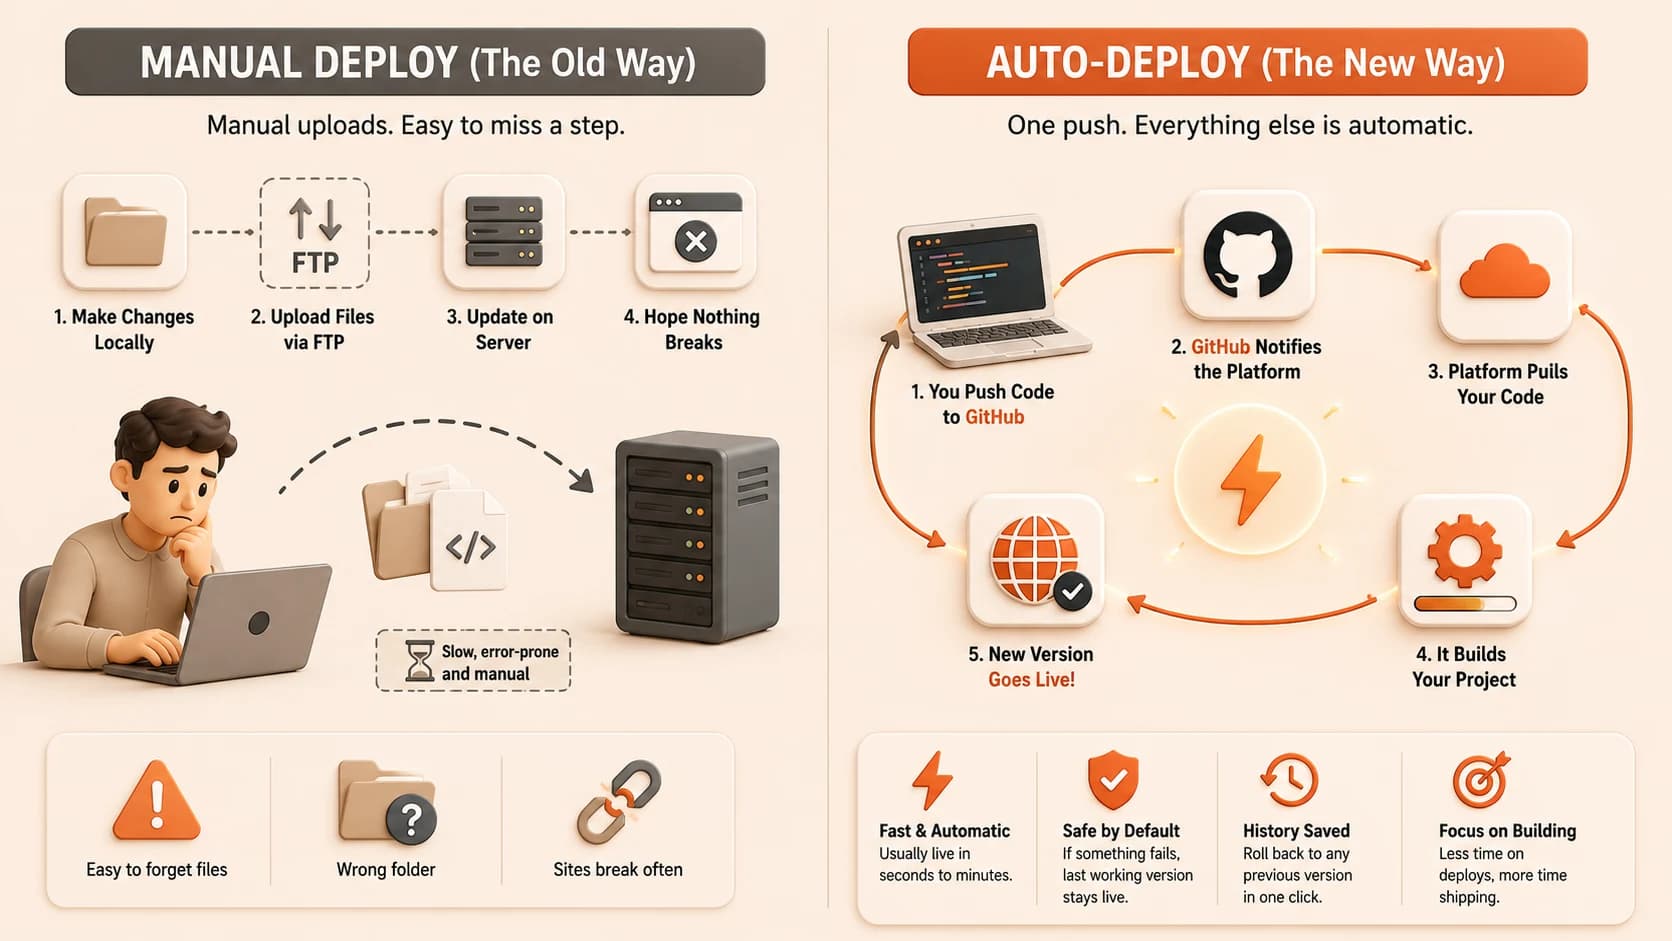
Vercel's own documentation describes this as watching your repository and rebuilding automatically on every push, which is exactly the mechanism you're now relying on without having to configure anything extra.
What If a Push Breaks Something?
A build can fail. A typo in an import, a missing dependency, a forgotten environment variable, any of these can stop a deployment from completing (you'll practice spotting exactly this in an upcoming lesson).
The reassuring part: most platforms keep your previous working version live until a new deployment fully succeeds. A broken build usually doesn't take your site down, it just fails to replace what's already there. When that happens, reading the deployment log calmly is the next skill worth having, it almost always names the exact line that broke.
And if a deployment does succeed but introduces a bug you didn't catch, platforms like Vercel and Render keep a history of past deployments. Rolling back to the last working version is usually a couple of clicks in the dashboard, not a repeat of the whole manual upload process from before.
GitHub's own explainer on CI/CD frames this safety net as one of the core reasons teams move to automated deployment in the first place: catching problems early costs far less than finding them after they've already gone live.
If any of this still feels shaky, that's normal this early. The Getting Started path covers every piece leading up to this moment, in order.
Push a change and watch it go live automatically
Open the repository connected to your Vercel deployment from lesson 09.03.
Make a small, visible change to index.html, like editing the heading text.
Commit and push it:
git add .
git commit -m "update heading"
git push
Go to your Vercel dashboard and watch a new deployment appear and start building.
Once it finishes, usually under a minute, refresh your live .vercel.app URL and confirm your change appears. No manual upload step, just a push.
Done? You've completed Lesson 09.07.
FAQ