How to Build AI Agents: What This Course Assumes First
This how to build ai agents course teaches you to build real agents inside Cursor and Claude Code, not a notebook, from zero to four shipped capstones.

You land on a course page called "Inside the Agent," and your first thought is probably the reasonable one: is this another tutorial where I copy code into a notebook, watch it print a result, and forget how it works by next week?
This is a how to build ai agents course, and you build inside real tools. Cursor and Claude Code, the same editors professional developers use every day, not a sandboxed notebook. You go from a total beginner's first install to four shipped capstone agents, and every single lesson ends with something you actually built, not something you read about.
Key Takeaways
- This path is environment-first: you build inside Cursor and Claude Code from lesson one, never a throwaway notebook.
- Modules 14-15 onboard you from zero; Module 17 onward you're hands-on with real Python, APIs, and databases, directing the agent that writes most of the code and learning to read, run, and fix what it produces.
- When a lesson needs a prerequisite you don't have, it links out to Getting Started or Beyond the Prompt instead of padding the lesson with a recap.
- Every lesson ends in a graded, checkable lab. The path itself ends in four portfolio capstones.
- This lesson's own lab is a 12-question self-placement quiz, printed in full below, no tools required, that tells you exactly where to start.
What Makes This AI Agent Course Different?
Most agentic AI courses hand you a framework and a notebook and call it done.
Every agent-building course I researched while planning this path, including Hugging Face's Agents Course, runs in a pre-configured sandbox or browser-based cell. You install nothing, you never touch your own terminal, and the moment the course ends, so does your access to whatever environment it gave you.
That's fine for understanding a concept. It's a bad way to learn a craft.
The one article I found that directly compared Cursor and Claude Code for building agents still treated them as an either/or choice, pick one and stick with it. In practice, working developers move between both in the same afternoon depending on the task.
I use both tools daily building the capstones in this path, and the split is real. Cursor is where I do fast, visual, multi-file editing with a model picker and inline diffs. Claude Code is where I hand off a whole task to the terminal and let it run while I do something else.
Neither replaces the other. That's the actual claim behind this how to build ai agents course: you learn both surfaces as one skill, not two competing tools to pick between.
The Arc: From Zero to Four Capstones
This path has a beginner-to-advanced arc, and knowing where you sit on it matters more than knowing every term on day one.
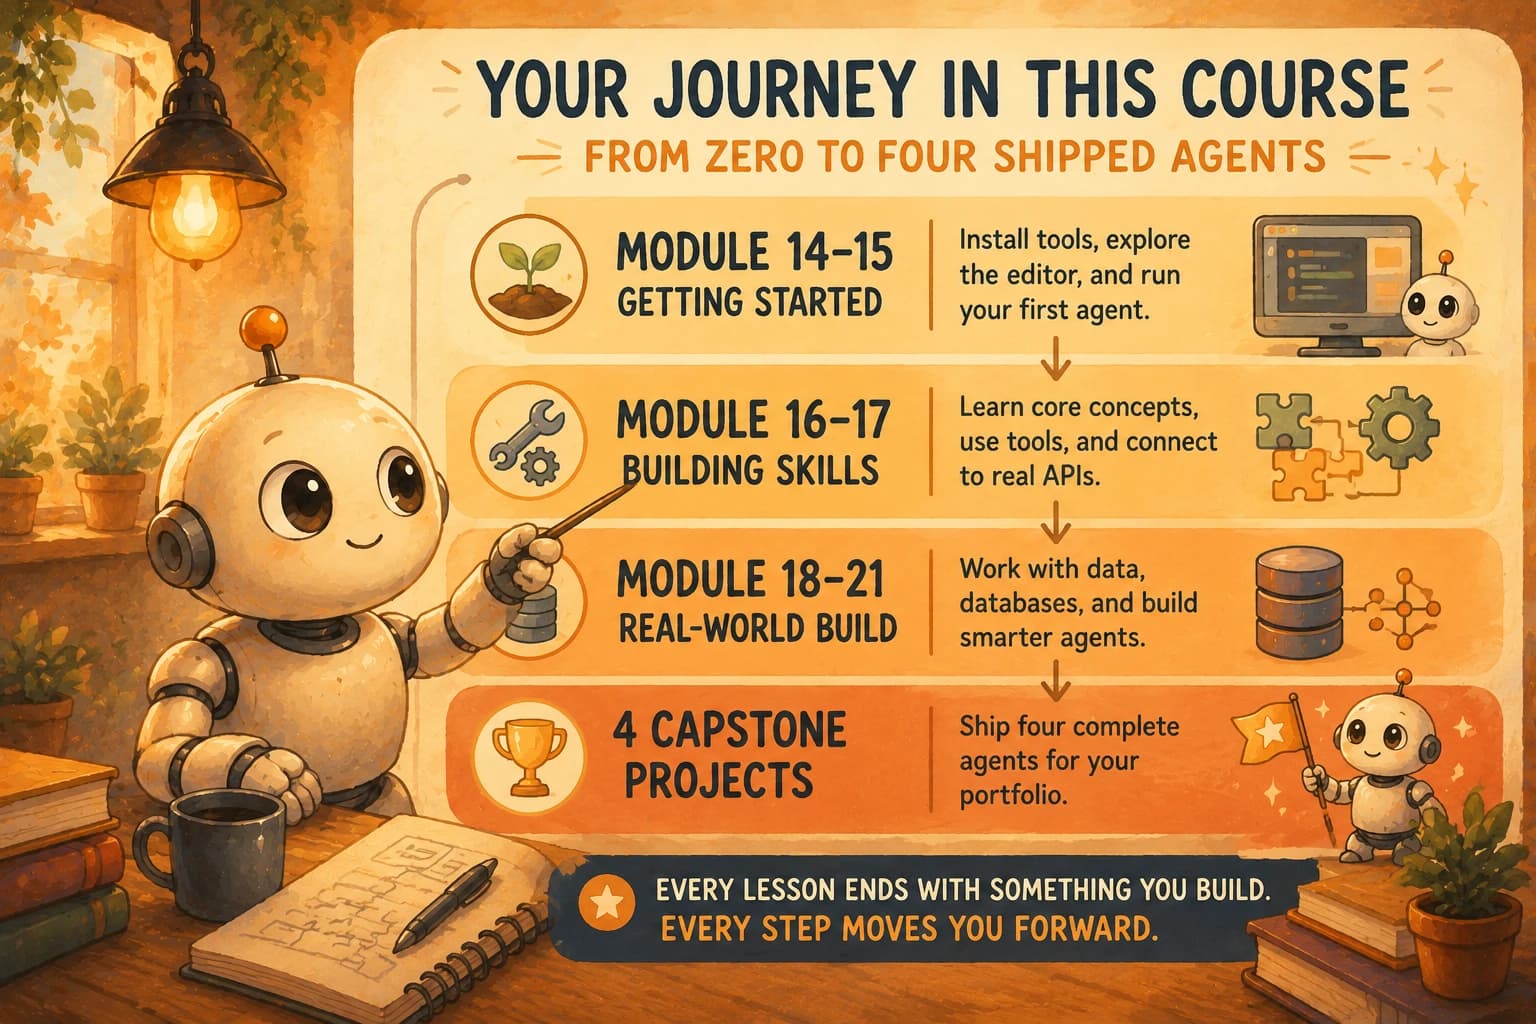
Modules 14 and 15 assume nothing. You install Cursor and Claude Code, learn the editor layout, and run your first real agent session, no prior agentic AI knowledge required.
From Module 17 on, the difficulty steps up. You're working directly with real Python, APIs, and databases: reading the code your agent writes, running it, and fixing what it gets wrong, while wiring up agents that persist state between runs. You won't hand-type every line yourself (that's not the point of an agentic AI course), but you can't direct or debug an agent you don't understand, so this is where you start reading code closely, not just prompting and hoping. By the end, you'll have shipped four portfolio capstones, real, working agents you built yourself, not toy demos you followed along with.
That arc is why this orientation lesson exists. Jumping into Module 20 without the Module 14-17 foundation is how people burn a weekend confused about why their agent keeps losing context, when the actual gap is one lesson back.
Knowing your own starting point on that arc matters more than memorizing the module list. That's the entire point of the self-placement lab at the end of this lesson: it tells you honestly whether you're a Module 14 beginner or ready to skim ahead to 16.
Cite, Don't Repeat: How This Path Handles Prerequisites
This path never pads a lesson to re-teach something covered better elsewhere on the site.
If a lesson needs terminal basics, Python fundamentals, Git, or how APIs work, it links you to the Getting Started path instead of spending 400 words recapping what pip install does. If a lesson assumes you already know how to write a clear, well-structured prompt, it points you to Beyond the Prompt rather than repeating prompt-engineering basics you may already have.
That's a deliberate contract, not a shortcut. It means every lesson in Inside the Agent stays focused on agentic AI concepts and never wastes your time re-explaining a skill a different path already teaches well. If you hit a link mid-lesson and already know the material, skip it and keep going.
What "Shipping" Means Here
Reading about agents and building one are not the same skill, and this path is built around the second one.
Every lesson ends in a graded lab you complete inside Cursor or Claude Code, never a "here's an example, go read about it" exercise. The lab produces something checkable: a file you committed, code that actually runs, a number you measured. Beginners who've gone through similar intensive courses consistently describe the same turning point: the moment a small, real agent they built actually worked, confidence jumped in a way that no amount of reading produced.
That's the design goal here. A tiny, working agent you shipped yourself teaches more than a chapter about agent architecture ever will.
Your Lab
You haven't installed Cursor or Claude Code yet, that happens in the next two lessons, so this lab runs right here on the page. Answer honestly, no looking anything up, and your score and placement appear the moment you finish.
Self-placement quiz
Answer honestly, no looking anything up. 0/11 answered.
Terminal and command line
1. When you see a command-line prompt on your computer, you:
Python basics
2. Reading a short Python script (10-20 lines, a function, a loop, an if statement), you:
3. The words "variable," "function," and "loop" are:
Git and version control
4. Git and GitHub, to you, are:
APIs and how software talks to software
5. An API request, in your own words, is:
6. An API key or environment variable is:
Databases
7. A database table, in your own words, is:
Prior AI and agent exposure
8. Chatbots and AI assistants (ChatGPT, Claude, etc.), you:
9. The difference between a chatbot and an "AI agent" that can take actions on its own:
Working independently
10. When software throws an error message at you, you:
11. Installing new software or a developer tool on your own computer:
Your actual goal (not scored)
12. In one sentence, why are you here? For example, “I want to ship a real agent project,” “I want a developer job,” or “I'm just curious how these tools work.” You'll reread this in Module 26.
Answer questions 1-11 above to see your placement. Question 12 is just for you.
Answer all 11 scored questions
Work through the quiz above, honestly and without looking anything up. Your placement result appears automatically once all 11 are answered.
Note your placement
Read the result box: it names your real starting instruction for this path, not a suggestion to skim past.
Save it somewhere you'll find again
Write down your score, your placement, and your answer to question 12 in any plain text file or notes app, name it learning-log if you want, it doesn't need to be a coding file yet. If you already use Git, feel free to commit it to a repo now. If you don't yet, don't worry: Getting Started teaches Git properly, and you'll come back to this file once you do.
Done? You've completed Lesson 14.01.
FAQ