How to Use Claude Code: Your First Autonomous Loop
How to use Claude Code as an agentic terminal: watch a real autonomous loop, understand permission prompts, and write your first CLAUDE.md.

I gave Claude Code three jobs in a row: create a file, run the test suite, fix whatever broke, all from the same terminal window I'd been using since Module 01. Twenty seconds in, a prompt appeared: Run npm test? (y/n). I hadn't asked it to ask. It just knew that running a command was a bigger deal than reading one.
That's the whole idea of an agentic terminal: instead of suggesting one line of code for you to accept, Claude Code reads your files, plans a multi-step change, runs commands, edits code, and reports back, pausing at a permission prompt whenever the next step is risky enough to need your go-ahead. Learning how to use Claude Code well starts with understanding that loop, not memorizing commands. Here's what the loop actually looks like, why the prompts exist, and how to give it a memory of your project with a file called CLAUDE.md.
Key Takeaways
- Claude Code runs a read → plan → act → report loop, not single-line autocomplete
- Permission prompts pause the loop before anything that edits files or runs a command, and you approve or deny each one
- The prompts exist because real incidents (a wiped production setup, a leaked token) happened when people skipped them entirely
- A
CLAUDE.mdfile in your project root is read automatically every session, so you stop re-explaining the same context- A five-line
CLAUDE.mdwith your test command and one convention is enough to notice the difference
What Makes Claude Code "Agentic" Instead of Just Autocomplete?
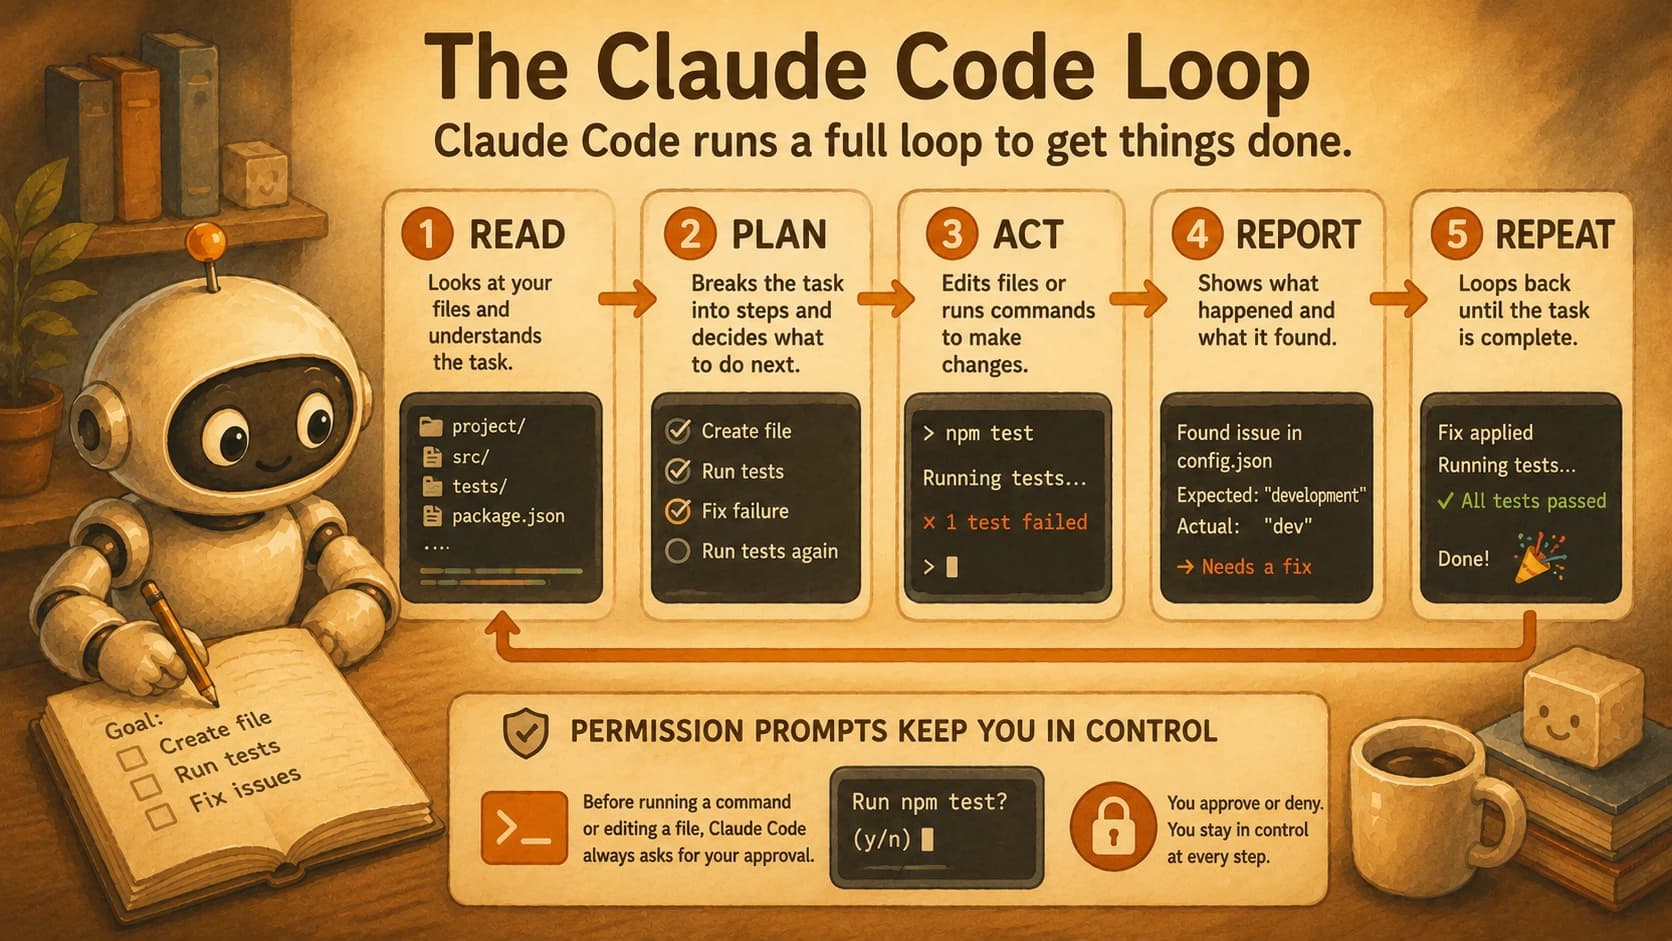
Claude Code is agentic because it decides its own next step across multiple actions, instead of stopping after one suggestion. A normal code-completion tool finishes the line you're typing. Claude Code reads your open task, works out a plan, and then keeps going: open a file, check what's there, write a change, run a command to verify it, look at the output, and decide whether that's actually done or whether it needs another pass. That cycle has a name, and it's what separates an agentic workflow from a single prompt.
You already met this distinction in Anthropic's own permission modes documentation, and it maps onto something you saw in Cursor's modes: Ask, Agent, and Plan modes are all about how much of that loop the tool is allowed to run before checking back with you. Claude Code runs the same loop from the terminal instead of an editor pane, which is why it can touch your whole project, not just the file you have open.
Watching the Loop: the Three-Step Chore
Here's the chore from the opening, played back in full. I asked Claude Code to create a small config file, run the test suite, and fix whatever the tests flagged.
> Create a config.json with { "env": "dev" }, then run npm test and fix any failure.

● Creating config.json...
● Running npm test...
  ✗ 1 test failed: expects config.env to be "development"
● Editing config.json: "dev" → "development"
● Running npm test again...
  ✓ All tests passed
Two things happened that a single-line autocomplete tool can't do. First, it noticed the test's expectation didn't match what it had just written, without being told to check. Second, it re-ran the same command a second time to confirm the fix actually worked, rather than assuming it did. I've watched this exact self-correction happen on a real project more than once, and it's the moment a beginner usually stops thinking of it as "autocomplete with extra steps" and starts thinking of it as something closer to a very literal junior engineer.
The permission prompt showed up right before each npm test run, because running a command is exactly the kind of step the loop pauses on.
What Permission Prompts Actually Protect
A permission prompt is Claude Code asking you to confirm an action before it happens, and it exists because those specific actions, editing a file or running a command, are the ones that can go wrong in a way reading a file never can. Reading is always safe. Writing and executing aren't.
Claude Code ships with a few permission levels, cycled with Shift+Tab in the terminal:
- Manual (the default, called "Ask" in some surfaces): Claude Code reads freely, but stops to confirm before it edits a file or runs a command.
- Accept Edits: file edits and safe filesystem operations auto-approve; anything riskier still pauses.
- Plan: fully read-only. Claude Code writes up a plan of attack and touches nothing until you approve it.
- Auto: prompts mostly go away, and a separate model reviews each action before it runs.
- Bypass (
--dangerously-skip-permissions): nothing pauses, ever.
That last one is where the real stakes case comes from. A widely shared incident involved someone running Claude Code with permissions fully skipped on a machine that also held production credentials, and a misread instruction ended up wiping a real setup, per Anthropic's own account of why they built a safer auto mode. That flag was designed for isolated environments like a CI container with no human watching and nothing valuable nearby, not your laptop with SSH keys sitting in it. The takeaway isn't "never trust the agent." It's: leave permission prompts on until you have a specific, isolated reason to turn them off.
Starting on the default Manual mode for at least your first few weeks isn't caution for its own sake. It's how you learn which actions actually feel risky to approve, so switching to a faster mode later is a real decision, not a guess.
Writing Your First CLAUDE.md
CLAUDE.md is a plain markdown file you put in your project's root folder, and Claude Code reads it automatically at the start of every session, so it already knows your commands and conventions before you type a single instruction. Without it, you end up re-explaining "run npm test, not pytest" every time you open a new session, which gets old fast once you're juggling more than one project.
You don't need a long one to get value. Here's a genuinely useful five-line version:
# my-project
Commands: npm run dev (start), npm test (tests), npm run lint (lint)
Structure: src/ is app code, tests/ is test files
Style: use functional components, no class components
Never: commit directly to main
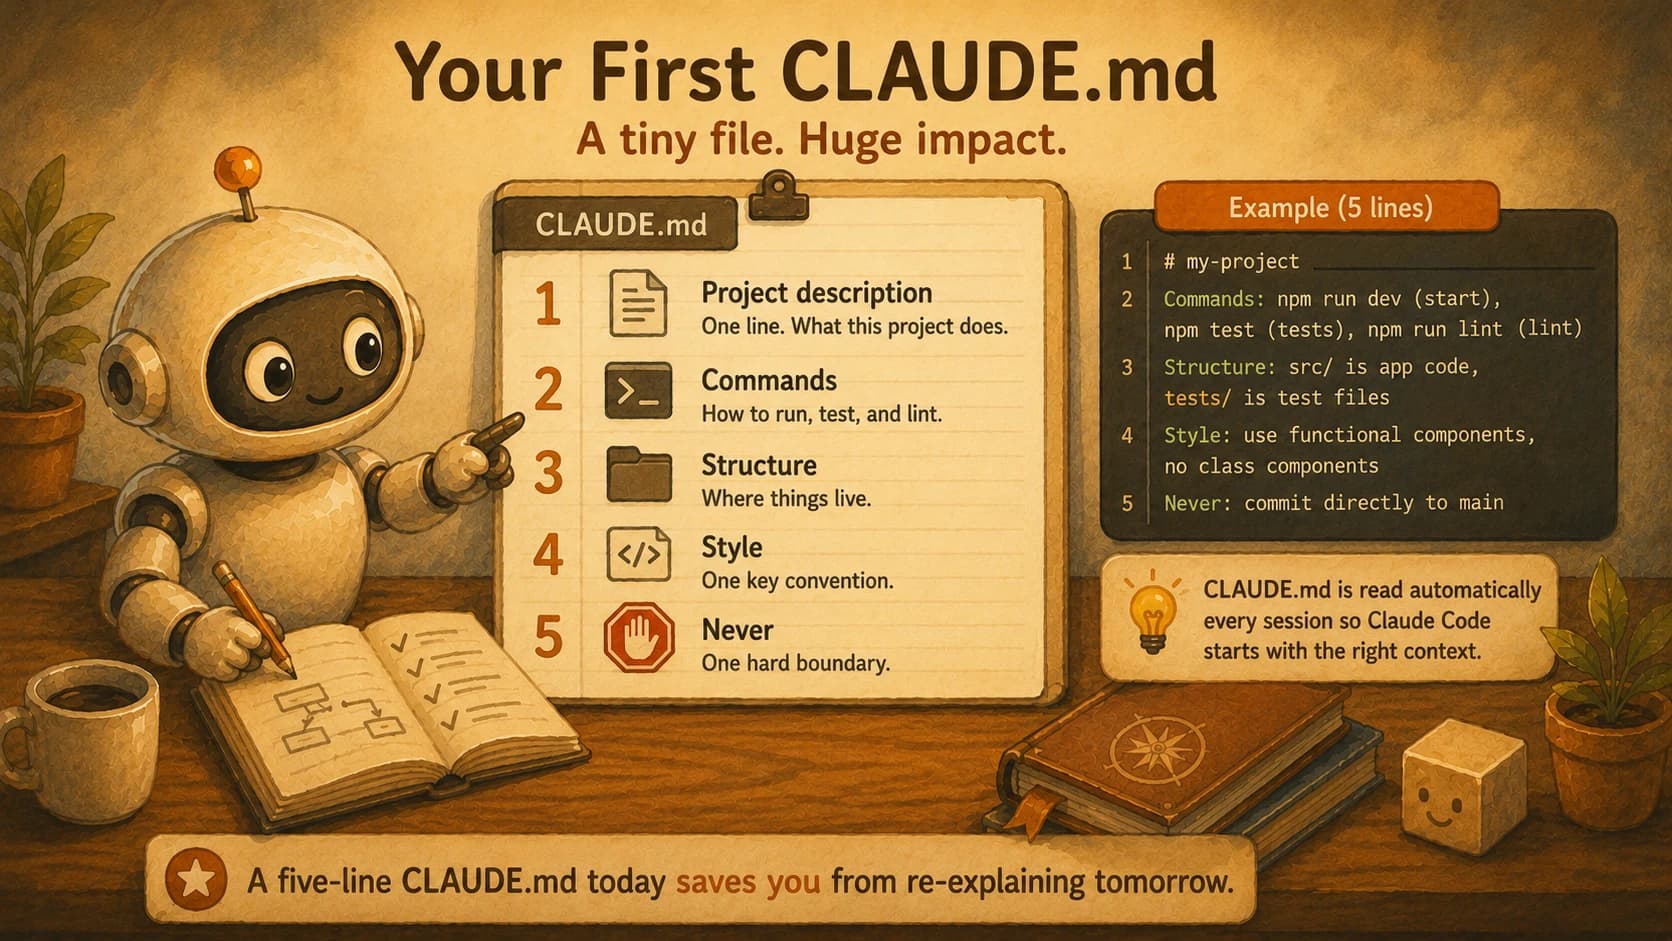
That's a real project description, real commands, one structural note, one style rule, and one hard boundary. Claude Code reads this file the moment it starts in that folder, and you can prove it: ask it to state a fact that only exists in your CLAUDE.md, like "what's the lint command for this project?" If it answers correctly without you telling it, the file is doing its job. @-context and codebase indexing covers the deliberate, per-question version of feeding it context; CLAUDE.md is the standing version that's always there.
Keep it short at first. A bloated CLAUDE.md with every rule you can think of is harder to maintain than it's worth this early, this file's job later in the path (Module 19) is a much deeper one, but right now, five honest lines beat fifty vague ones.
Your Lab
Run the three-step chore
In a scratch project (or any repo you don't mind experimenting in), open Claude Code and give it: "Create a file called notes.txt with one line of text, then run any test command this project has, then fix any failure it finds." Let it run.
Annotate every permission prompt
For each permission prompt Claude Code shows you during that chore, write one line in a new learning-log.md: what it asked to do, and why you approved it (or didn't).
Write a five-line CLAUDE.md
In the same project's root folder, create CLAUDE.md with: a one-line project description, your real commands, your folder layout, one style rule, and one thing to never do, modeled on the example above.
Prove it's being read
Start a fresh Claude Code session in that folder and ask it a question whose answer only exists in your CLAUDE.md (for example, your lint command). Paste its correct answer into learning-log.md.
Done? You've completed Lesson 14.06.
FAQ